Overview
So far in this Tutorial, we have used only the Main window explaining the various ways in which you can use shots. Next, we'll begin to modify those shots.
All of the icons you clicked on in Wirecast Basics were shots. They were simply configured in different ways. Some shots had only titles in them. Some shots had only a Foreground.
Your goal in creating a presentation in Wirecast will be to create the Shots you will use in your presentation so that when you are presenting you are simply choosing, in real time, the shot you wish to use.
So on to Editing these shots.
Clearing the Slate
Before we edit shots, let's clear the slate.
Select "Create Document For Tutorial" from the "Help" menu.
Shot Editor Overview
Double click on the Ripples Shot.
This opens a shot editor for the Ripples shot.
NOTE: If you save a document with the window open, Wirecast remembers this and will re-open the edit window when it the document is re-opened.
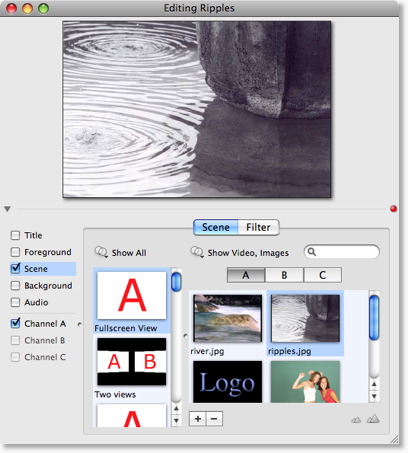
This window has three main areas:
Shot Preview Area (Top)
This area depicts exactly what this shot will look like to your viewers if you were to make this shot live.
Element Selector Area (Bottom Left)
This area allows you to select the different elements of the shot to edit.
In addition, this area controls visibility of each of the elements.
Configuration Area (Bottom Right)
The configuration area changes appearance depending on the selected Element. This is where you make changes to the content of the shot