Transitions
In the previous examples, a "fade" occurred when you clicked on a shot. This is because the default Transition "Smooth" was selected.
The area of the main window, shown below, controls your transitions:
Click on the River shot. It will smoothly fade in while the previous shot fades out.
Next, click on the Bowstring Button, the Transition area should like this:
Now click on the Ripples shot.
The Ripples shot should appear using the "Bowstring" effect.
You can change the transitions that appear in these three buttons by selecting another from the menu for the button. You can either click on the small arrow to change the transition, or you can click on the button and drag downward.
Change the first button ("Cut") to be "Swoop" by clicking on the "Cut" button and dragging downward until the popup menu appears.
Then select "Swoop" from the popup. Swoop should now be selected for the first button. Now try to click back and forth between River and Ripples. So you have the ability to have 3 transitions at your finger tips.
These transitions are assigned to the following key combinations: Command-1, Command-2, and Command-3 for quick access.
Transition Speed
You can also Control how fast a transition will occur, by using the Clock icon:

Choose "Slow" from this popup, and you'll see the Clock icon change to look like this (a small turtle means "slow"):

Now when you perform a transition, it should occur more slowly than before.
Go Button
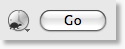
The Go Button (or Command-G) allows you to make a transition occur at any time. If you click it now, the transition will occur between the shot and itself.